Amazon FBA is incredibly tempting to entrepreneurs, larger businesses, and even to people with no previous eCommerce or business experience at all.
This is mostly due to the hands-off approach it allows you to take to things like inventory and shipping, letting Amazon’s global logistics empire handle all of that while you work on more enjoyable aspects like sourcing products and marketing.
Despite this, newcomers can often get confused when it comes to the process of actually shipping products to Amazon and getting the whole thing up and running. With so many variables in play, it can seem intimidating at first, when actually a bit of experience will show you it’s pretty easy.
Going blindly into it without doing your research has historically been pretty tough however, as you’re faced with a range of abbreviations like FTL, ASIN, FNSKU and UPC with no idea what any of them mean.
Since we have spent the last several years as the #1 Amazon Consultancy service and have catapulted countless businesses to the top of the Amazon FBA game, we thought we would put together what we know into a simple and easy to read, yet complete Amazon FBA guide that will give you all the information you need to jump right in.
With that in mind, welcome to our complete step-by-step guide to how to ship inventory to Amazon FBA!
How to Ship to Amazon FBA

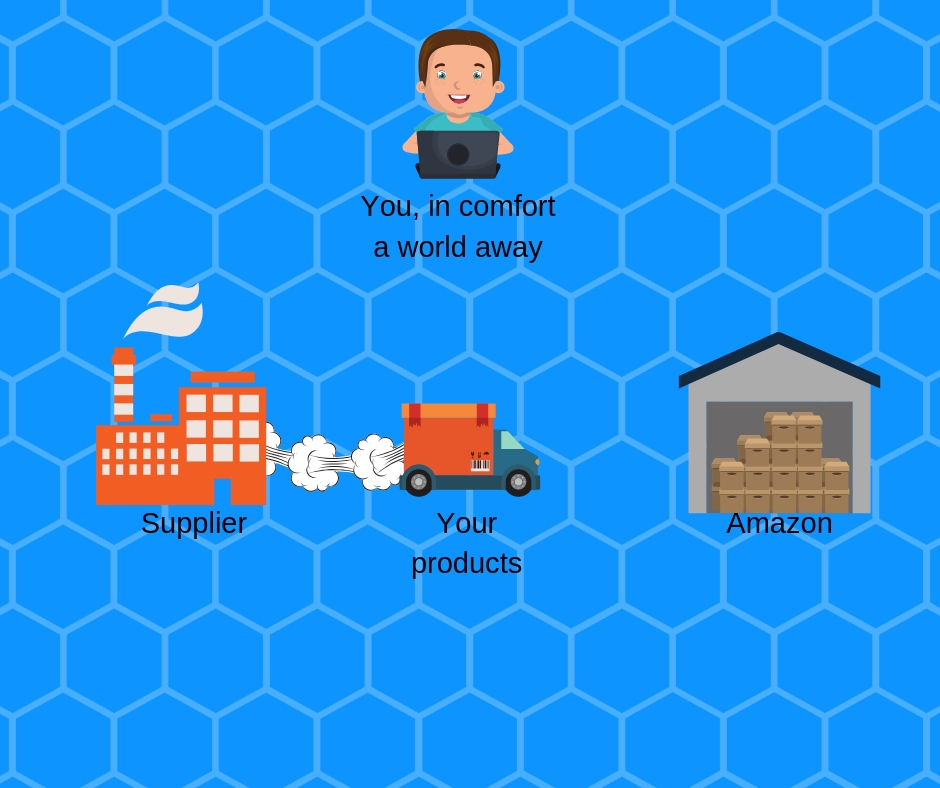
First things first, this guide will only be covering the logistics of getting your products from the manufacturers or wherever you have them stored, into Amazon’s fulfilment system so they can begin selling.
If you are curious how this works or are looking to get into selling via Amazon FBA, congratulations, you’ve landed on the best possible page!
If you are interested in selling on Amazon in general and need to learn about the whole process, we have a huge range of existing guides and information for both new and experienced Amazon sellers, so be sure to check out the following resources:
- Complete Guide to Selling on Amazon for Beginners
- Guide to Trending eCommerce Niches & How to Find Products to Sell
- Product Photography Guide
- How to Build an Effective Marketing Strategy
- KeyworX (the best Amazon organic rank tracker)
All of these will help fill in the blanks and give you a complete understanding of selling on Amazon FBA, how it works and the best practices that can help you come out on top.
KeyworX itself will help you track your product’s organic ranking and learn exactly what works and what doesn’t when it comes to your marketing efforts.
With that said, for the rest of this post, we are going to assume you already have that stuff covered and just focus in on getting your products into Amazon and ready to be sold.
Let’s dive right in:
What You Will Need
Before making a start, go through this checklist to make sure you have everything you’ll need to run through the whole process:
- Products – It goes without saying that you should already know what you’re trying to sell and have the products ready to go, either in your own storage, at home, or in your supplier’s warehouse.
- Quantity of Cases, Size and Weight of Cases, and Units Per Case – Amazon requires this information before you send anything so they know what to look out for, how much of their space it will take up and can tell if anything goes missing. If you’re sending products directly from a supplier to Amazon, you will need to ask the supplier for this information and pass it on to Amazon before anything is dispatched.
- A UPC barcode – All items sent to Amazon require a barcode. If you are creating an entirely new product you will need to purchase a barcode from GS1. These need to be attached to each individual product packaging. You can print them and do this yourself if you are sending the products directly. If you are sending them from your supplier to Amazon, most suppliers are willing to do this for you for a small extra cost. It is definitely worth checking if this is the case beforehand.
- Courier & Mailing Location – You will be asked who will be delivering your goods to Amazon and from where. Often this will be UPS as they are partnered with Amazon and offer discounts for FBA shipping, but you can use any courier you like generally.
FNSKU vs ASIN
Chances are you already know what ASIN and SKU mean, but people quite often ask us:
“What is FNSKU?”
….so we will cover them all quickly just for the sake of clarity:
ASIN is a unique identifier for every product listed on Amazon. If you’re using an existing listing, the ASIN already exists. If you create a new listing, a new ASIN will be generated. It is also the unique code displayed in the URL bar for every Amazon listing.
SKU is essentially your own personal ASIN, allowing you to set up your own identifiers to keep track of each of your products.
FNSKU is a code made up of your ASIN and SKU and is used to create your Amazon barcode.
Creating Your Amazon FBA Shipping Plan
Creating a shipping plan is essentially how you inform Amazon which products you’re sending them, in what quantity, and who will take care of things like labelling and packaging the products (yourself, the manufacturer or Amazon).
If your product is private label, or otherwise not already being sold on Amazon, the first thing you will have to do is actually create the product listing.
If you are selling pre-existing/white label products, you can skip this step and select an existing product listing to tell Amazon what the item is.
Creating an Amazon Product Listing
To create your listing, simply log into Seller Central and follow the below steps:
Go to Inventory>Manage Inventory
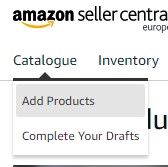
Click Add a Product (top right)
If you are adding a product that already exists on Amazon, you can search it and select it here.
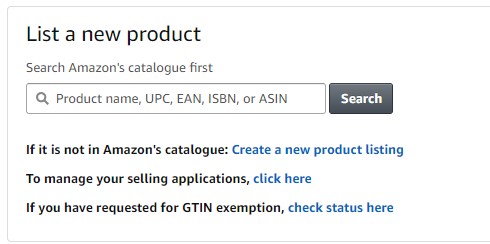
If not, you want to go to Create a New Product Listing.
Fill in all the necessary details to create your listing.
We also have a guide to adding products to Amazon which will go into more detail regarding how to optimize an Amazon listing and maximise the information you need to enter here, so check that out if you think you might need it. This guide will assume you already know that stuff and have a badass listing, so we will just focus on the next step – creating a shipping plan.
Creating Your Shipping Plan
Now that there is a listing associated with your product, continue with these steps:
Go to Inventory>Manage Inventory again.
Select the item(s) you want to ship to Amazon, go to the Actions on Selected menu and select Send/Replenish Inventory.
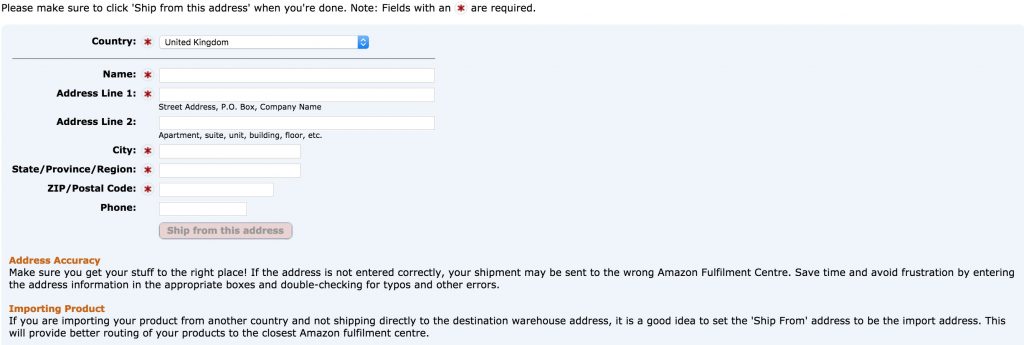
First, you will need to enter the address you are shipping from, as mentioned above. This could be your own address or the address of your supplier.
The main purpose of this is to ensure your shipment is routed to the closest Amazon facility, so if you’re ordering from abroad it is a good idea to use the import address here.
You will then also have to enter details on how the products are packed and click Continue to shipping plan.
You may need to send products to multiple different fulfilment centres at this stage to make sure they are as close to as many customers as possible, so don’t be surprised if you are asked to split the cases to different addresses somehow.
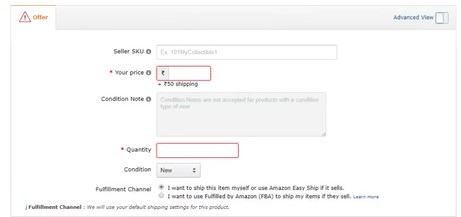
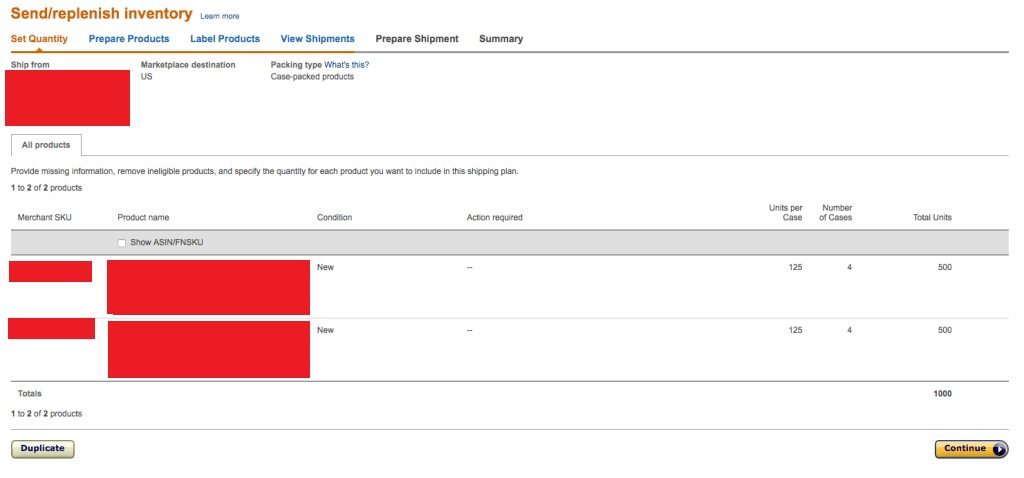
Input Quantities
At this stage, you need to enter the quantities of all the stock you are planning to send.
You may be given alerts recommending you not to send certain items, for example, if they have been slow moving in the past or demand is currently reduced.
You can also use a copy of a previous plan and make changes to it to save time, which will come in handy when the time comes to restock.
It’s SUPER important to get all of these details correct as Amazon will happily turn your cases away if something turns up differently to how they were expecting or without the proper packaging and labelling.
Once you’re sure all the information is correct, as long as you don’t have any alerts, we can continue to the next step.
Preparing Your Products
Now is a great time to check out Amazon’s packaging requirements to make sure you don’t fail to comply with any.
Go to Prepare Products
Then select Prep Required
You will be given details on how each product needs to be prepared here and will have to make sure this is done correctly to avoid any products being turned away.
Once again you can either manage this yourself or get the supplier to do it.
There is also the option of allowing Amazon to do this for you, meaning you can essentially skip this step and just make sure the products are sent in a timely and well-packaged manner, but this will incur extra fees.
As a new startup or sole trader with limited resources, it is usually best to save a bit of money by doing this yourself. For more established brands with more funds to hand, you may find it’s better to save time and avoid any mistakes by letting them do it.
Once you’re ready, click Continue to move on.
Labelling Amazon Products
As you know, all items need to be labelled correctly to be accepted into and tracked within Amazon’s fulfilment centres.
You can essentially either pay Amazon to label them for you, print labels directly and attach them yourself, or use previously existing UPC codes for products that have them.
Click onto the Labeling Required section to see which products cannot be accepted without the correct labelling.
You can then download these barcodes directly from this page and print and attach them yourself, email them to your supplier to attach, or simply select “Amazon” in the Who labels section to absorb the extra cost and let them handle it.
Amazon maintains its own guide to product barcode guidelines so it’s worth checking regularly in case anything changes.
We also have our own guide to Amazon barcodes, so definitely check that out too.
Check Everything Twice
Once a shipment is accepted and approved, you will struggle to delete it or alter quantities.
As a result, you want to double and triple check all of the details at this point to make sure you’re 100% ready to go ahead and haven’t made any errors.
Once you’ve approved the shipments and are 100% sure there are no mistakes, all is ready to go, so simply click on Work on shipment to continue.
Preparing Your Amazon FBA Shipment
You can now go to the Prepare Shipment page and confirm all the final details such as:
- The shipping method & company being used
- How many separate boxes are being sent
- When your items will be dispatched

It’s also time to print and attach the labels if you’re sending the items yourself.
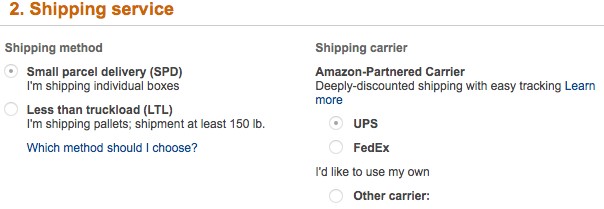
You will need to choose one of the following options regarding the size of your shipment.
These seem to come out of the blue and throw off a lot of newcomers but are actually fairly self-explanatory when you realise what they are describing:
- SPD (Small Parcel Delivery) means your products are sent in a few boxes
- LTL (Less Than Truckload) means your products are being sent on a pallet on a truck with multiple other pallets
- FTL (Full Truckload) is… a full truckload
Full truckload is, of course, the option that will give you the most bang for your buck, both in terms of the shipping cost and in the sense that the truck will go direct to the fulfilment centre with no other drop-offs or collections.
However, chances are you won’t be able to afford enough stock for a full truckload when first starting out, which is nothing to worry about – you can work up to it.
You will need to finalise all the information here, from the amount of each ASIN per box to the size of your pallet etc.
The details required vary based on your shipment and shipping method, but they are all easy and self-explanatory. Just take your time and make sure everything is correct!
Last but not least, you’ll be given a total shipping charge for your shipment.
Accept it, then dispatch the items yourself or give your suppliers the go-ahead to do so.
From there, Amazon will take care of your stock, sell it for you and handle delivering it to your customers, so all you need to worry about are things like marketing and boosting your organic rankings to make sure your stock moves (and researching your next products!).
Luckily, your friends at AmazonSEOConsultant have a wide variety of blog posts and in-depth guides, and taking the time to read through them will make this whole process a lot more manageable.
If you find yourself struggling to stand out and get orders amongst the competition, we also offer low-cost Amazon management solutions which allow you to benefit from our process, the most effective way to boost Amazon rankings, period. Click the link to learn more about that, or fill in our proposal form to see what we could do for your business.
A few of those and some good reviews from customers, and as long as your product is attractive and priced appealingly – you can’t fail!